How to Create and Use SegMetrics Tracking Links
Tracking Links help you measure the effectiveness of your marketing campaigns when directing traffic from external sources like email blasts, PPC campaigns, or banner ads. They're normal URLs with UTM parameters that provide more specific tracking than generic UTM codes.
When to Use Tracking Links
Use SegMetrics Tracking Links when directing traffic to pages with SegMetrics tracking code from external sources such as:
- Email marketing campaigns
- Pay-per-click (PPC) advertising
- Social media posts
- Banner advertisements
- Newsletter content
Note: You don't need tracking links for SegMetrics to track visitors. They simply provide better organization and monitoring for your external marketing efforts.
Creating a Tracking Link
Step-by-Step Process
- In SegMetrics, click Tracking Links in the left menu under tools
- Click Create Link
- Choose either Builder or Existing Link
- Enter a descriptive name for your link
- Enter the complete URL (including http:// or https://) of any page with SegMetrics tracking code
- Configure UTM parameters:
- UTM Source: Where the link comes from (facebook, google, newsletter)
- UTM Medium: How you're using the link (cpc, banner, email)
- UTM Campaign: Select existing SegMetrics campaign or create new one
- UTM Content: (Optional) Specific ad, post, or email identifier
- UTM Term: (Optional) Additional tracking parameter
- Click Save Link
Using Your Tracking Links
Copying and Implementing Links
- Navigate to Tracking Links in the left menu under tools
- Search for your desired link by name or URL fragment
- Click the Copy icon to copy the link to your clipboard
- Paste the URL into your marketing content
Analyzing Link Performance
View Individual Link Data
- Go to Tracking Links in the left menu
- Find your link and click the Contacts number to open the contact report
- Review visitor data and conversion metrics
Filter Reports by Tracking Links
- Open any report in SegMetrics
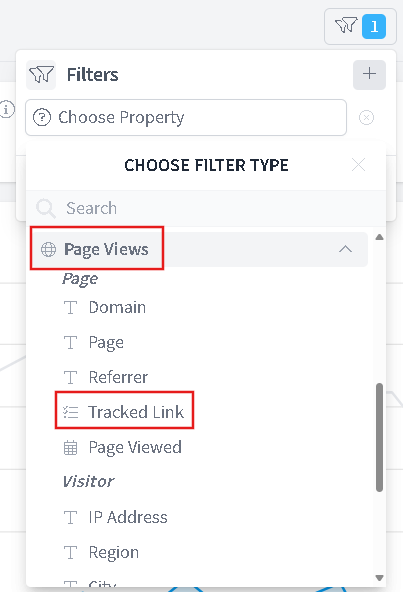
- Click Add Filter
- Click the Page Views icon
- Choose Tracked Link
- Select your specific tracking link
- Click Add Filter
Testing Your Tracking Links
Using the Debug Feature
- Go to Tracking Links and copy your test link
- Navigate to Site Setup Page (https://app.segmetrics.io/a/settings/snippet)
- Scroll to the Debug Tracking Pixel section
- Paste your tracking link into the field\ 
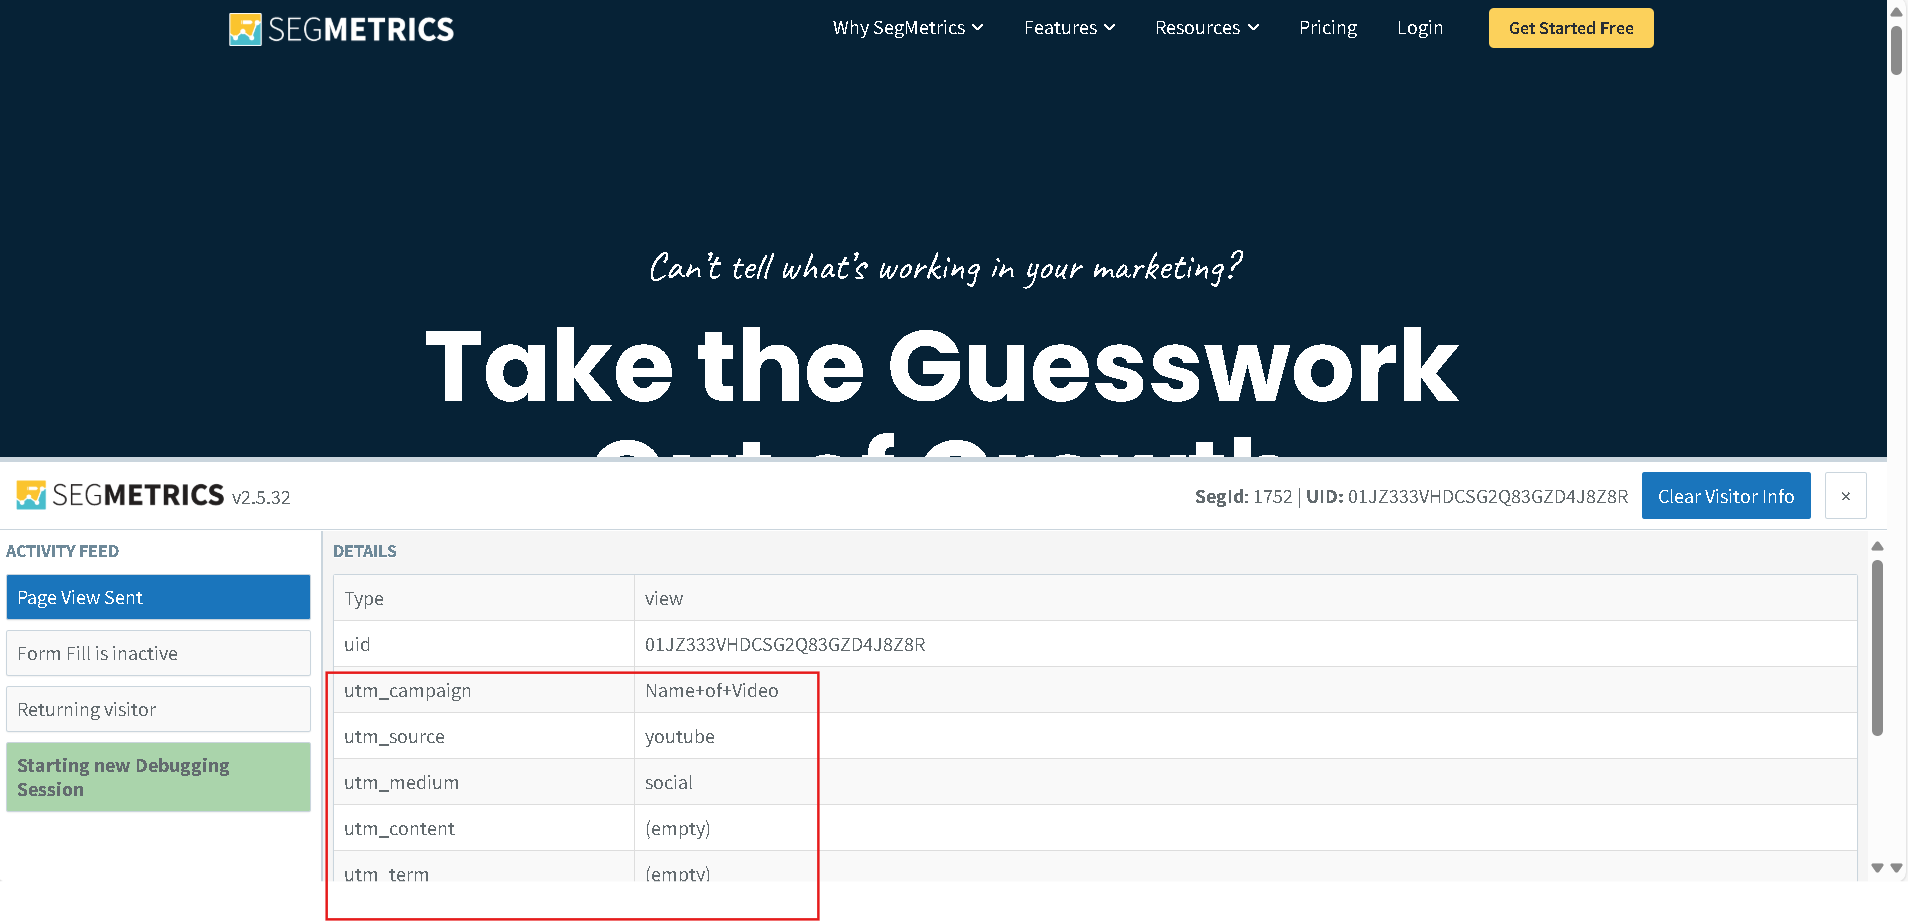
- Click Start Debugger
- SegMetrics opens the landing page in a new tab
- Verify all UTM parameters appear in the debugger screen
Frequently Asked Questions
Q. Do I need tracking links for SegMetrics to work? No, SegMetrics tracks visitors automatically.
A. Tracking links provide enhanced organization and detailed attribution for external marketing campaigns.
Q. Can I edit a tracking link after creating it?
A. Yes, but you will have to replace the old link everywhere with the new one
Q. How quickly do tracking link results appear in reports?
A. Tracking data appears in real-time once visitors click your links and arrive on pages with SegMetrics tracking code installed.
Q. Can I use the same tracking link across multiple campaigns?
A. Yes, but for better attribution and analysis, create separate tracking links for different campaigns, even if they lead to the same landing page.
Need help with tracking implementation? Contact our support team for assistance.