Tracking Links to 3rd Party Sites
In some cases you may want to track visitors or contacts who are clicking on links that go to sites that you don't control. A common example of this would be when you want to track email clicks to affiliate sites, or are doing 3rd-party promotions.
Much like Facebook or Google Pixels, because SegMetrics requires the tracking pixel to be on the page that the contact visits in order to track them. If that site is out of your control, then that can be difficult.
Installation
There are two ways to add tracking to links heading to 3rd party sites:
- PixelMe
- WordPress
PixelMe.me PixelMe is an URL shortener that embed retargeting pixels from Facebook, Adwords, Linkedin and more into shortened links. It works similar to other URL shorteners like Bit.ly, but allows you to add pixel tracking and custom branding to any of your links.
Install the SegMetrics Pixel in PixelMe
- In SegMetrics, go to your Site Setup page (https://app.segmetrics.io/a/settings/snippet) from the gear in the top menu, and copy the pixel code.
- Go to your PixelMe (https://app.pixelme.me/settings) dashboard. Under the Audience Builder 'Settings' tab, you can add your Custom Pixel.
- Alternatively, if you are using Google Tag Manager together with SegMetrics, you can add the Google Tag Manager Pixel instead.
Create the Retargeting Link
- Once you've added the SegMetrics pixel, follow PixelMe's guide on adding a new retargeting link.
- In the top right corner, select the 'Create a redirect' button.
- Add your destination URL, edit your UTM settings as required, and don't forget to add it to a folder to make it easier to find later. If you're using these links from emails, be sure to add the contactId to the emails to track them across domains.
- Now, select the SegMetric pixel to include it in your link.
- If you have a custom domain set up, you can select that as well.
Configure Your Custom Domain (Optional)
If you're sending contacts only to affiliate sites, then there's no need to have a custom domain in PixelMe. However, if you want to increase the fidelity of your tracking, and track leads across multiple affiliate sites through PixelMe, it is beneficial to set up a custom domain for PixelMe.
- Go to the 'Settings' tab on your PixelMe account, then click the 'Custom Domain' tab.
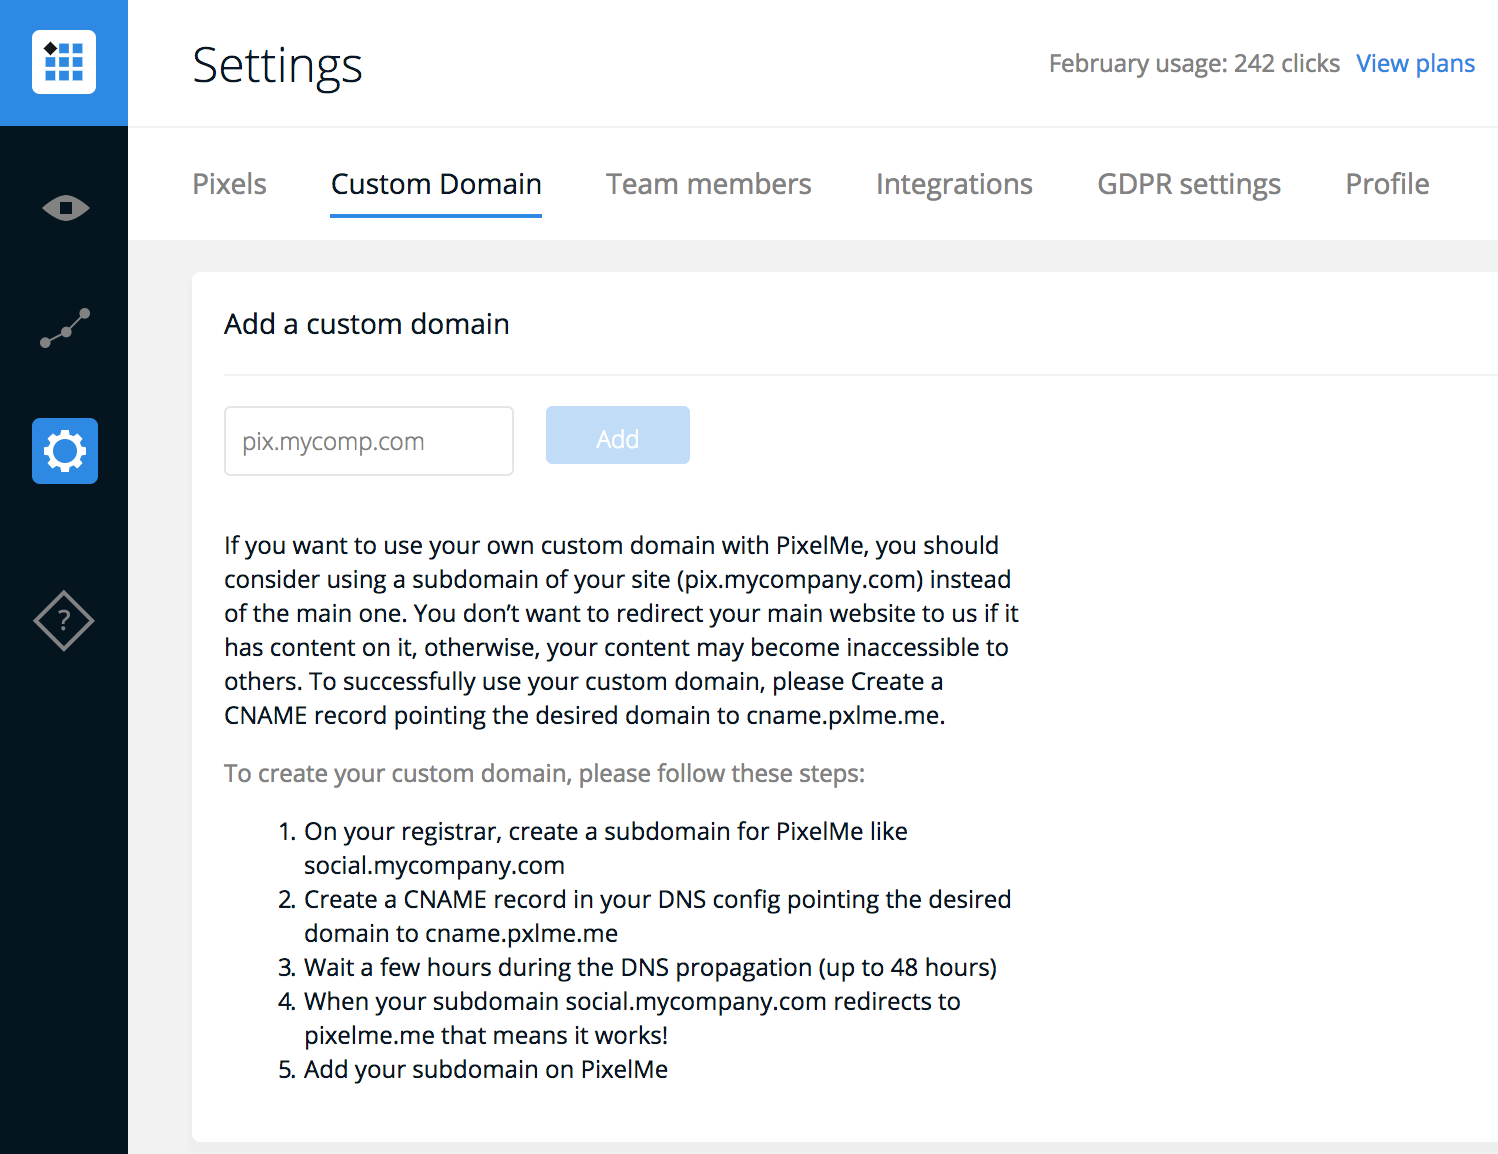
- Add a subdomain of one of your main domains, and press "Add"
NOTE: in order to track users effectively across all the sites, use a subdomain of your main marketing site. For example, if your main domain is example.com, make the PixelMe domain pix.example.com
- Follow the PixelMe's instructions for setting up your CNAME and DNS.
Create a Tagging Redirect in WordPress
If your site is using WordPress, you can set up a redirect system that will tag users before they get redirected.
Install & Configure the Plugin
- To set up the redirect, we'll want to use the Quick Page/Post Redirect Plugin (https://wordpress.org/plugins/quick-pagepost-redirect-plugin/).
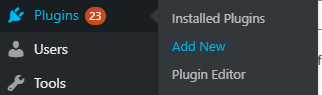
- From the WordPress Admin, click on Plugins > Add New
- Search for "Quick Page/Post Redirect Plugin" and then click the Install Now button.
- Once Installed, click the Activate Button
- Now we're going to configure the plugin to tag contacts who are visiting your redirect links. From the WordPress Admin, click Quick Redirects > Meta Options

- Set Redirect Seconds to be 1
- In the Page Content section, add your SegMetrics Pixel from your Site Setup page (https://app.segmetrics.io/a/settings/snippet).
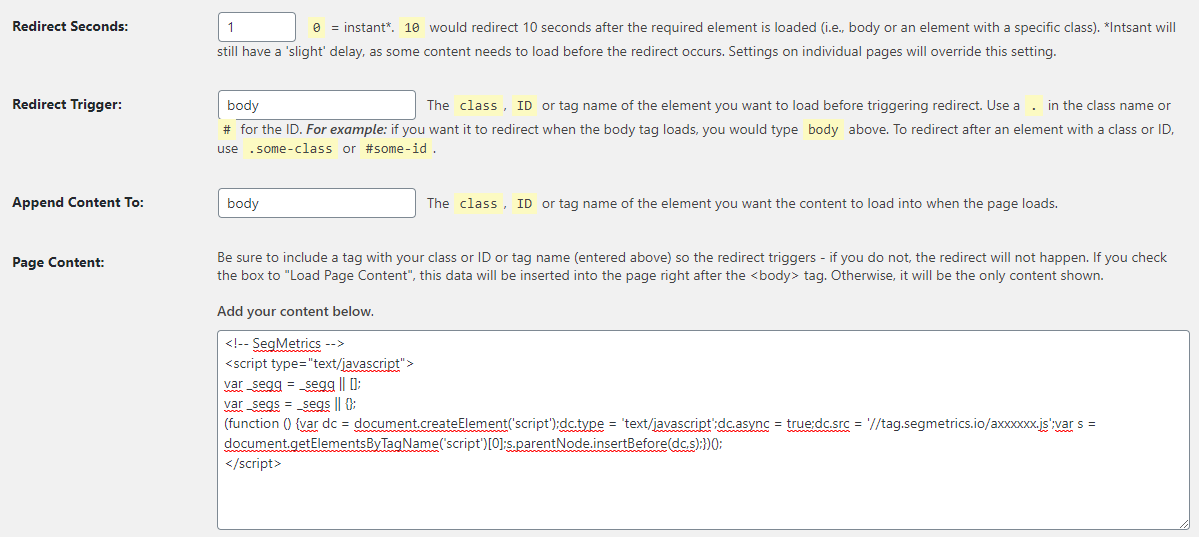
- Click Save Changes
Create Redirects
Now we're ready to create our redirects! Because this plugin automatically passes in any query strings or UTM values that we send it, we do not need to configure utm values in the redirect destination.
- From the WordPress admin, click on Pages > Add New
Note: For organization purposes, we recommend having all your redirects be Child Pages under a short top-level page like /r/. This will allow you to instantly know which pages are redirects and which ones are actual pages in your site.
- Under the Quick Page/Post Redirect heading, check the box next to Make Redirect Active
- In the Redirect / Destination URL box, enter the entire URL that you want to redirect to WITHOUT any UTM values or query strings
- Set the Type of Redirect to be Meta Redirect
- Set the Redirect Seconds to be 1.
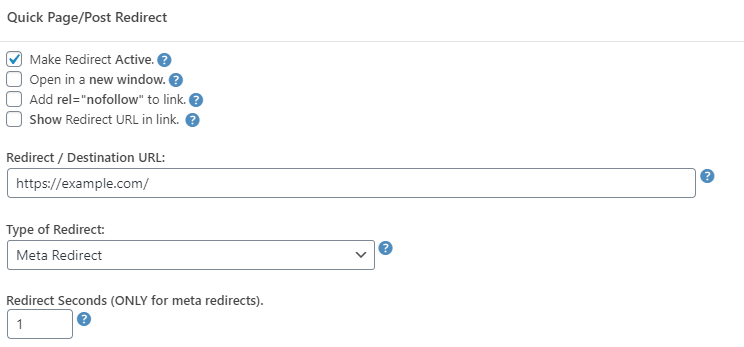
- Click Publish to publish your post
- Then, send users to the URL of that page to have them automatically redirected to your third-party site, with all the tracking intact. If you're using these links from emails, be sure to add the contactId to the emails to track them across domains.
Frequently Asked Questions
Q: Which method should I use - PixelMe or WordPress redirects?
A: If you already have a WordPress site, the WordPress method gives you more control and keeps everything within your own domain. PixelMe is better if you don't have WordPress or need a quick, hosted solution for multiple campaigns.
Q: Do I need a custom domain for PixelMe?
A: Only if you want to track users across multiple affiliate sites through PixelMe. If you're just sending contacts to individual affiliate sites, the default PixelMe domain works fine.
Q: Why should I use a subdomain of my main site for PixelMe?
A: Using a subdomain of your main marketing site (like pix.example.com) helps SegMetrics track users more effectively across all your sites, improving attribution accuracy.
Q: What happens to UTM parameters when using WordPress redirects?
A: The Quick Page/Post Redirect Plugin automatically passes through any query strings or UTM values, so you don't need to configure them in the redirect destination - they'll be preserved automatically.
Q: Can I track clicks from emails using these methods?
A: Yes, both methods work with email links. For better cross-domain tracking, make sure to add the contactId to your email links as described in the improving tracking fidelity documentation.