WooSender
Connect WooSender to SegMetrics to unlock deeper insights, accurate revenue attribution, and full customer journey tracking. Gain clarity on which AI-powered campaigns, appointment bookings, and multi-channel strategies drive the most conversions and revenue for your business.
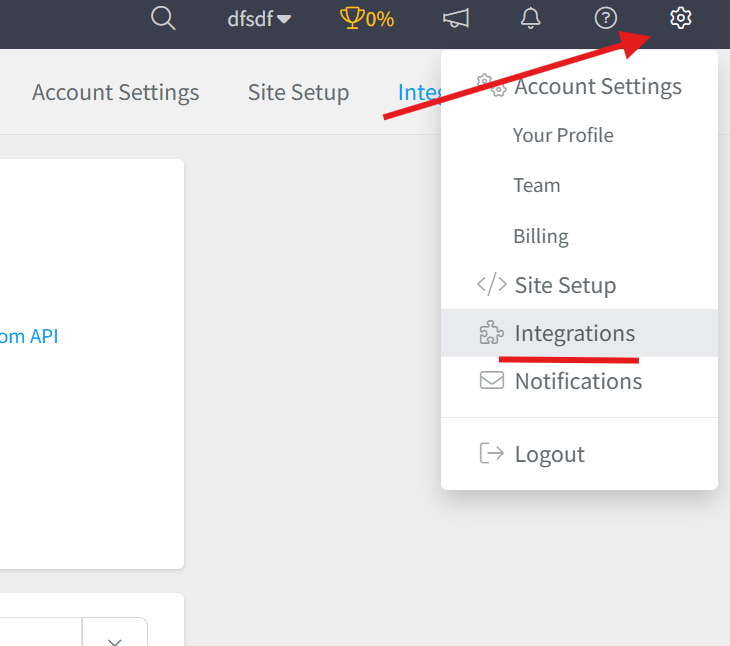
Step 1: Access Integrations in SegMetrics
- Log in to your SegMetrics account.
- From your dashboard, click Settings.
- Navigate to Integrations.
Step 2: Select the WooSender Integration
- Browse or search for WooSender in the integrations list.
- Click on the WooSender Integration.
- Give your integration a clear name.

Step 3: Connect Your WooSender Account to SegMetrics
- On the WooSender integration setup page in SegMetrics, click the Connect WooSender button

- You will be redirected to WooSender to authorize the connection.
- Log in to your WooSender account if prompted.
- Review the permissions that SegMetrics is requesting access to, which may include:
- Campaign data and performance metrics
- Appointment booking information
- Lead engagement and communication history
- Contact and CRM data
- Click Authorize or Allow Access to grant SegMetrics permission to access your WooSender data.
- You will be redirected back to SegMetrics automatically.
- Your integration status will show as Connected once the authorization is complete.
Note: The connection process uses secure OAuth authentication, which means you don't need to manually copy and paste any API credentials. The connection is established safely between the two platforms.
Step 4: Verify the Connection
- Once redirected back to SegMetrics, confirm that the WooSender integration appears as Connected or Active in your integrations list.
- Navigate to your SegMetrics dashboard to see WooSender data beginning to sync.
- Allow up to 24 hours for historical data to fully sync after the initial connection.
Once connected, SegMetrics will automatically start importing your WooSender campaign data, appointment metrics, lead engagement information, and conversion data.
Frequently Asked Questions
Q: What are the benefits of connecting WooSender to SegMetrics?
A: Connecting WooSender to SegMetrics gives you deeper insights into your AI-powered sales automation, accurate revenue attribution, and full customer journey tracking, helping you understand which SMS campaigns, email sequences, appointment booking strategies, and multi-channel communication approaches drive the most conversions, show-ups, and revenue for your business.
Q: What credentials do I need to connect WooSender to SegMetrics?
A: You don't need to manually retrieve any API credentials. The integration uses OAuth authentication, which means you simply click the "Connect WooSender" button in SegMetrics, log in to your WooSender account when redirected, and authorize the connection. The authentication is handled automatically and securely between the two platforms.
Q: How do I complete the connection between WooSender and SegMetrics?
A: Go to Settings → Integrations in SegMetrics, select the WooSender integration, give it a clear name, click the "Connect WooSender" button, log in to your WooSender account when redirected, authorize the connection by clicking "Allow Access," and you'll be returned to SegMetrics with the integration successfully connected.
Q: What can I track once WooSender is connected to SegMetrics?
A: With the integration active, you can track how your WooSender AI campaigns tie directly to revenue, monitor lead engagement across SMS, email, voice, and live chat channels, analyze appointment booking rates and show-up percentages, track customer journeys from first contact through conversion, measure the effectiveness of your automated follow-up sequences, and gain clearer attribution across your sales funnels and revenue streams.
Q: Can I disconnect and reconnect WooSender if needed?
A: Yes, you can disconnect the WooSender integration at any time from the Integrations page in SegMetrics by clicking on the integration and selecting "Disconnect." If you need to reconnect, simply click "Connect WooSender" again and re-authorize the connection. Your historical data will be preserved, and new data will resume syncing once reconnected.